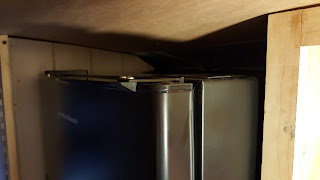
Compressor-type refrigerators have none of those issues, and are always cheaper to buy and repair, or in some cases, just throw away and buy another one. Our goal in the way we want our trailer/RV is to be as trouble-free and dependable as possible. If repairs or replacements are needed, most things can be obtained from any builder or hardware store, much quicker and at much less expense than trying to find a qualified RV repair facility and have to wait for specialized parts. And due to the simplicity, I can do most repairs myself, rather than pay expensive shop labor prices.
The one major problem with using residential refrigerators in mobile vehicles is that they are never designed to keep the doors closed securely. Setting stationary, there is no need for it. But when used in moving vehicles it could be a huge problem!
In researching ways to keep the doors closed, we have seen many make-shift and shoddy methods, which do nothing for the looks of the fix. Some people have used simple screen door hooks to overly large and "clunky" padlock hasps, none of which look professional, and can even fail during transit.
A simple search on Amazon for "refrigerator lock" yielded several different options. Since our refrigerator is black, we wanted something which would be of similar color and not look like a cobbled repair. We found the "Designer Collection H593 Refrigerator Travel Lock Latch" sold by Amazon. These come as a pair, for double door refrigerators like ours, but I ordered two of them, anyway, just so we would have a spare. Experience has taught me that when dealing with delicate parts that are hard to find, it is always prudent to have spares on hand.
 |
| The freezer door latch with the door open. |
In installing them, I could see a lot of room for improvement in design. For one thing, the angle part bends way too easily. Couple that with a door with a rounded trim piece along the edge, and I found that if the door were pulled hard enough, the latch would lift itself and allow the door to open. Also, the sides of our doors are rounded, so the latches had to be installed either above or below the doors. I chose below the bottom door and above the upper freezer door, as that was the only places where there was a reasonably square edge for the latch to grab. It's not the most convenient place, as the recessed grab handles are between the doors. But because of the thickness of the latch, there wasn't enough space between the doors to lift the latch and clear the doors.
 |
| The freezer door latch with the door closed. |
 |
| The bottom refrigerator door latch with the door closed. |
I may have to get out my Dremel grinding tool and do that myself. As far as the tension, I will keep my eyes open for a flat piece of spring steel that has a 90-degree bend on it, and add that over the angled piece to make it harder to lift. The combination of these two improvements should solve any problems with the doors opening in transit.
As far as looks, I think these are the closest thing that one could find that have the resemblance of factory installed hardware. Still, if you have to mount a residential refrigerator in an off-road vehicle like a truck camper or outback trailer, maybe a nice chrome padlock hasp mounted on the side would still be the safer bet. Just be careful not to drill into any cooling tubes, or your refrigerator would soon turn into a paperweight!
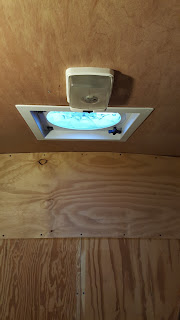
As for other tasks completed in the last few weeks, I also finished the trim around the Fantastic fans and mounted the original dome lights, but with new LED lamps in them. Based on other people's experiences with cheap LED lamps failing (these are from Walmart) we bought a second pair of LED's, and also kept the original 1156 lamps. If the LED's become a problem, I know there are better brands available, which should last a lot longer.
 |
| The front fan and light. |
 |
| The rear fan and light. |
 |
| In the center of the picture you can see the water pump switch. |
Meanwhile, I have been collecting other wiring parts and should now have everything I need to finish all the wiring. And after a few last minute changes in plumbing techniques, I think I now have all the parts to finish the plumbing. Since both tasks require getting into the rear storage compartment, where the sun shines on it directly in the afternoons, and also getting under the frame on the left side for the city water and drains connections (also in the sun), I am awaiting a cooler day, hopefully with some cloud cover. Once the rear compartment and under the frame is done, the rest (except for the solar panels) is all inside work, in glorious air conditioning! In fact, I may do some of that first.
I have also finished the roof rack, as far as I can go until I mount the solar panels...also a job for a cooler day! I bought a piece of treated deck board, which is 5-1/2 inches wide. I ripped that in two on the table saw to make two strips 2-3/4 inches wide. then used a round-over bit in my router to duplicate the factory edge on the uncut side. I then drilled a pair of 1/2-inch holes in three locations, and the width of the roof rack cross members, to allow stainless steel aviation straps to go through the board to secure it to the roof rack.
 |
| The roof rack boards from the top, showing the mounting straps. |
 |
| The roof rack and straps from the bottom. |
When I get ready to mount the panels, I'll post again about the details involved, but for now, this is how far I've gotten with preparations for them.
As soon as the plumbing and electrical is operational, and we have cushions/mattresses installed, we intend to move into the trailer prior to our leaving, just to get a feel for it and figure out what else we need. To date, we haven't done anything about towel bars, extra shelves in the cabinets, and minor details like that. We feel that only by living in the space will we know how to arrange such details.
For those not interested in construction techniques or what it takes to get on the road debt free, and only want to see travel stories and photos, please stand by! We should be all done with this stuff in a couple more weeks, and we hope to be out of here by...(correction), BEFORE, the end of this month, and then all we will be doing is traveling.
Thanks for reading, and let us know your thoughts.

No comments:
Post a Comment
We welcome conversational comments that are on topic and useful. Links to personal blogs are fine, but we will not approve comments made for the sole purpose of linking to a commercial business, and/or which have no direct relevancy to the topic of the post. Thank you.
Only those who have Google accounts may comment, as the platform has done away with the "Open ID" concept.